Most people who want to start making leather bags spend more time looking for the right pattern than actually making anything. There are hundreds of options — free downloads, Etsy sellers, YouTube tutorials with no pattern attached — and it's genuinely difficult to tell what's worth your time before you've bought it and printed it and realized the pieces don't match or the instructions stop halfway through.
This guide is based on one thing: what actually works for someone making their first leather bag. Not the patterns that look impressive in product photos, but the ones where a person with no leatherworking background followed the instructions and ended up with something they were proud of. We know this because we read every review and every message from customers who write to say it worked — or to ask why it didn't.
"Vasile has been making leather goods since 1988 and has trained dozens of apprentices — people who had never touched leather before. Every pattern in this list reflects that experience."
— Vasile & Pavel, Bucharest workshop
What Makes a Pattern Actually Beginner-Friendly
A pattern being labeled "beginner" doesn't mean much. What matters is whether someone with no prior experience can follow it from start to finish without getting lost. In our experience, that comes down to four things:
- A dedicated video for that exact pattern Not a general leathercraft tutorial. A video showing that specific bag being built, piece by piece, using the same PDF you downloaded. You should be able to pause at any point and see exactly what the leather in front of you should look like.
- Full-scale PDF — print at home, no scaling This sounds obvious but many patterns require you to scale at a print shop or do math to resize. A real beginner pattern prints correctly on a standard home printer at 100% scale. You print, cut, trace. Done.
- Pre-marked stitching holes Hand-stitching leather is not difficult, but spacing stitches evenly is hard for a beginner. A pattern with holes already marked on every piece removes one of the biggest sources of frustration for first-time leathercrafters.
- Few pieces, clear sequence A beginner bag should have 4–8 main pieces and a construction order that makes logical sense. If you need to understand how everything connects before you start cutting, the pattern is too complex.
The Best Beginner Bags to Start With
Crossbody bags are the best starting point for most people. They're small enough to complete in a weekend, structurally simple — usually a body, a flap or zip closure, and a strap — and the result is something genuinely useful. You're not making a practice piece that ends up in a drawer. You're making something you'll carry.
Mini bags are the step before crossbodies if you want to spend half a day rather than a full weekend. They introduce the same construction logic — body panels, attachment points, a closure — but at a size where mistakes are cheaper and faster to correct.
Belt bags and pouches are the fastest builds in the catalog: an afternoon project, very few pieces, and the skills you practice — clean cutting, consistent stitching, edge finishing — transfer directly to every larger project that follows.
Our Recommendations for 2026
These are the patterns from our catalog that beginners complete most successfully, based on review volume and direct customer feedback.
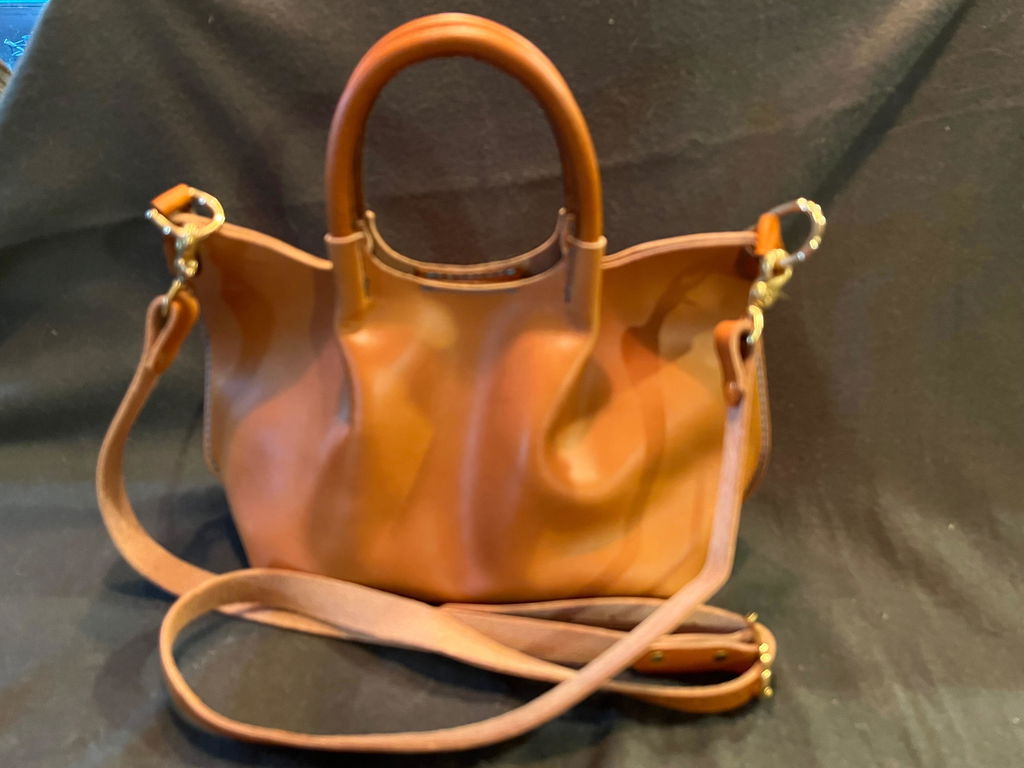
Alice Crossbody Purse Bag
The single most completed first-bag project in our catalog. Simple three-panel construction, single main compartment, adjustable strap. Customers from over 50 countries have made this as their first leather project. The video tutorial covers every step including installing the hardware — the part where most beginners get stuck.
View Pattern →Hedgehog Mini Bag
One of the most distinctive designs in the catalog — a mini bag with a hedgehog silhouette that's become a customer favourite for first projects. The shape looks complex but the construction is approachable: a front panel, back panel, gusset, and strap. Beginner-friendly sequence with a full video tutorial. Makes an exceptional gift as well as a first leather project.
View Pattern →Leather Phone Case
A slim leather phone case is one of the best entry projects in leathercraft: just a few pieces, no complex hardware, and something you'll actually use every day. This pattern is completable in a single afternoon and teaches the two skills that matter most for every larger project — clean straight cuts and even hand-stitching. A practical starting point before committing to a full bag.
View Pattern →Leather Backpack Pattern
The best-selling pattern in the catalog and the goal project for many customers who started with a crossbody or mini bag. A full leather backpack is a more involved build — multiple panels, shoulder straps, hardware — but with the video tutorial it's achievable for someone who has completed one or two smaller projects first. A finished leather backpack made by hand is something most people keep for decades.
View Pattern →Tulip Pencil Cup
Not a bag — but worth mentioning for anyone who wants a very fast first leather project before committing to a full bag build. A leather pencil cup introduces the same core skills (cutting, punching, stitching, edge finishing) in about two hours. The tulip shape is elegant and the result sits on a desk or makes a straightforward gift. A good confidence-builder before moving to a crossbody or backpack.
View Pattern →Free Leather Patterns
If you've never worked with leather and want to test the format before spending anything, we have over 11 free patterns including bags and accessories — each with a PDF and video tutorial. No account required, instant download. A good way to see whether our pattern style and video format works for you before committing to a paid pattern.
View Free Patterns →One Thing Most Guides Don't Tell You
The hardest part of a first leather bag is not the stitching. It's the cutting. A slightly uneven stitch line is almost invisible on a finished bag. A slightly crooked cut on the main body panel is permanent. This is why we recommend starting with a small project — not because the construction is simpler, but because the cut pieces are smaller and a clean straight cut on a 10cm piece is much easier to achieve than on a 40cm piece.
If you're cutting by hand, use a metal ruler and make multiple light passes with a sharp knife rather than one heavy cut. If you have a Cricut or laser cutter, use the DXF file included in every pattern — digital cutting eliminates this entirely and is the fastest way to get clean results on a first project.
What Leather Should a Beginner Buy?
Vegetable-tanned leather is the standard recommendation and ours as well. It's firm, cuts cleanly, holds its shape, and develops a patina with use. For bag bodies, 1.5–2mm thickness is right. For straps, 2.5–3mm. You don't need a full hide for a first project — most leather suppliers sell half-hides or offcuts, and a crossbody bag uses roughly half a square metre.
Avoid split leather (the underside layer of a hide, often sold cheaply) — it tears easily and doesn't hold stitching well. Chrome-tanned leather is softer and more forgiving for stitching but less structured, better suited to softer bag styles. For a first structured bag, veg tan is the right choice.
About Vasile & Pavel
Vasile Vasilache has been a professional leather craftsman since 1988. He started in Bucharest making sandals from a welding-grade pigskin apron bought at a construction site. Over three decades he trained dozens of apprentices, made props for international film productions (including one that won the Grand Prix at Cannes), and built a workshop practice around the idea that every technique can be taught to someone starting from zero — if the documentation is good enough.
Pavel joined the workshop in 2007, bringing AutoCAD pattern-making and 3D-printed mold technology alongside his father's hand-craft tradition. Together they've built a catalog of over 300 patterns with 5,200+ verified customer reviews averaging 4.92/5 stars.
Browse all 200+ leather bag patterns — each with a full-scale PDF, DXF vector file, and dedicated video tutorial.